With an abundance of fresh videos on the Alamy library covering a wide range of topics including wellness, lifestyle, technology and many more, there are countless video options that will help you engage with your audience.
You may find that you’ll want to add text to your videos to drive engagement. We already do this using stills with copy space so it’s natural that we’d want to do the same in videos too. But what if you want to place text behind a moving object in your video?
With this simple tutorial using Adobe After Effects, you’ll soon know how. Then you’ll have the tools to give your videos an extra edge.
Step 1: Find and import your video
Once you’ve chosen the video, you need to import it into Adobe After Effects. Then you need to duplicate it. You can use the shortcut Command + D (Control + D on Windows).

Duplicate your video with the shortcut Command + D (Control + D on Windows).
Step 2: Place your text
Some people may choose to make their mask first. And that’s fine, but I’ve decided to place the text first so that I can see where the mask needs to be.
You can do this using the text tool in the top-left. I’ve placed my text right in the middle, and I want it to appear as the elephant moves past the frame.
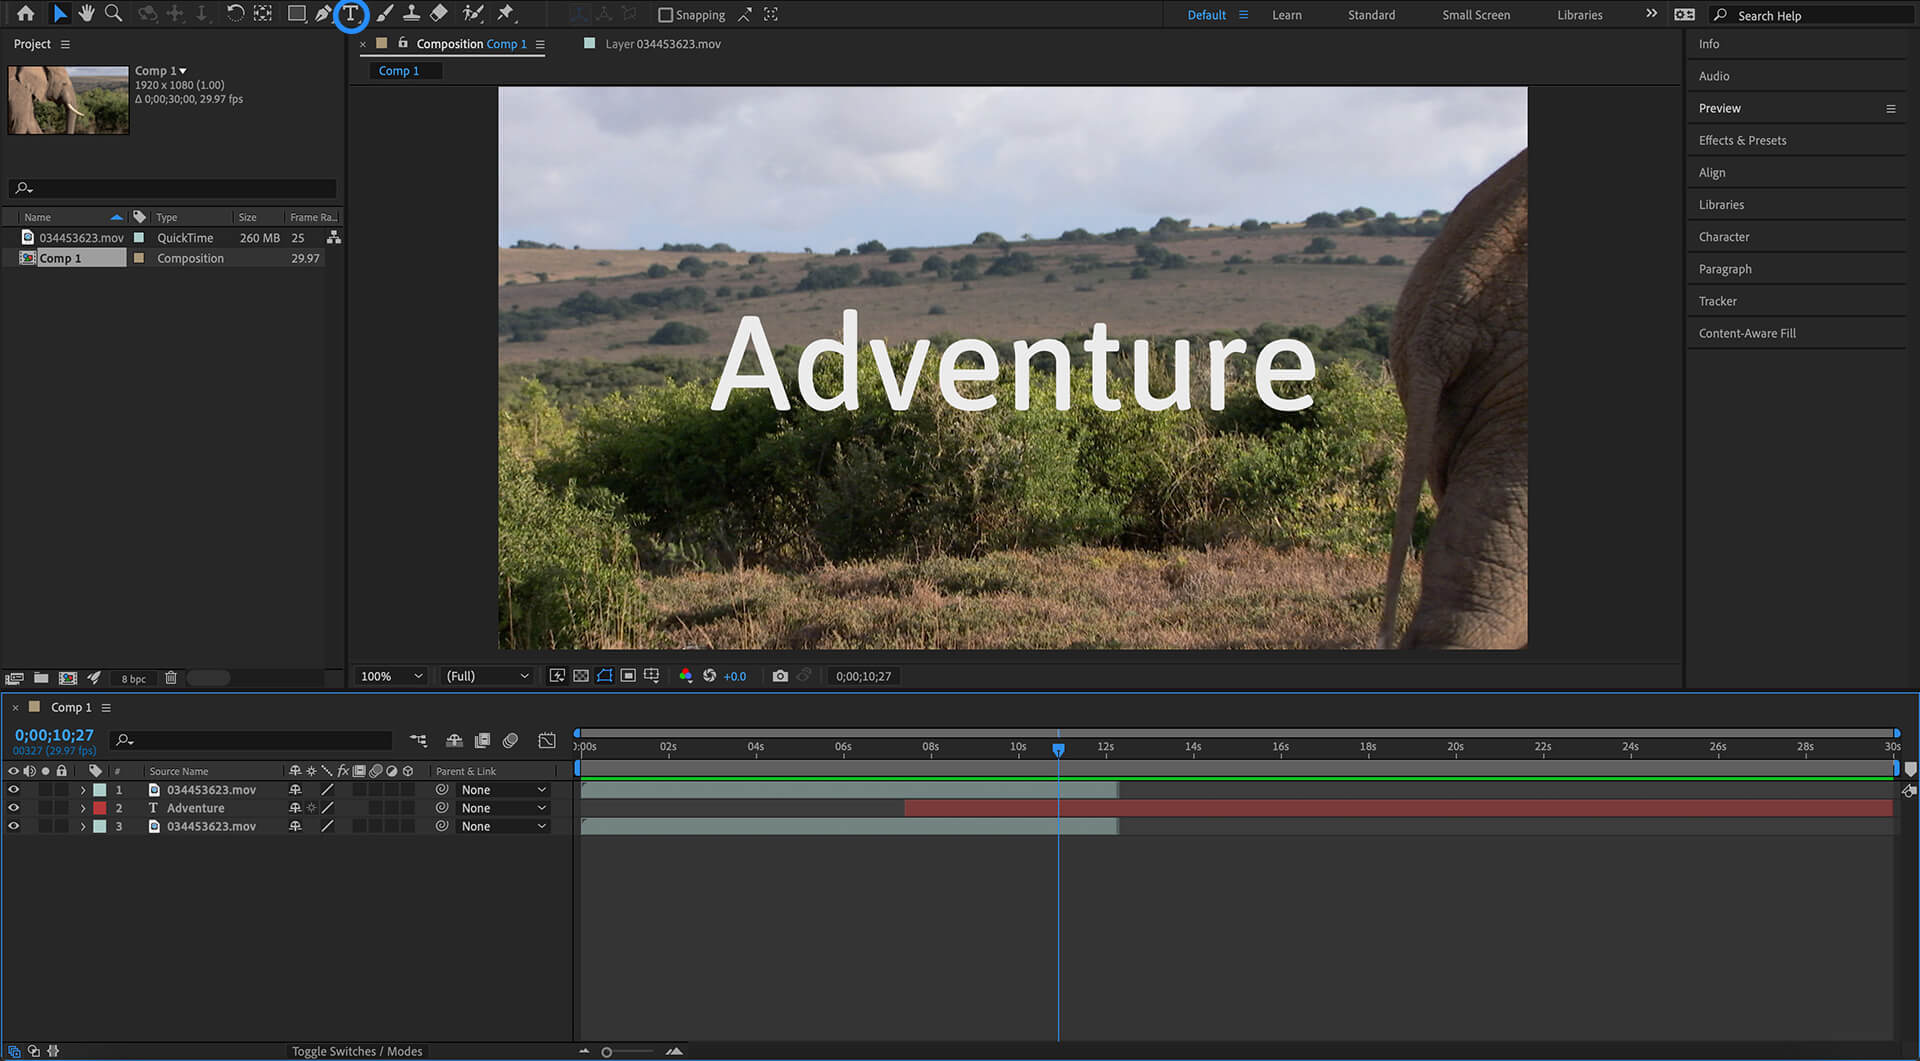
Placing your text first gives you an idea of how large your layer mask needs to be.
Step 3: Create your layer mask
You can create your layer mask using the pen tool. Simply draw an outline around your object. This part of the process can be quite long depending on how complicated your moving object is.
As you can see from my layer mask, you don’t always need to be super accurate. I’ve only paid close attention to the area around the elephant’s butt where the text will appear from.

Your layer mask doesn't have to be super accurate except for the edges that pass directly over your text.
Step 4: Track the mask
Track the mask by opening up your layer with the arrow icon, going to the masks section, and right-clicking the mask you created. Then select ‘Track Mask’.
This will open up a tracker on the right-hand side. After Effects will track your mask automatically when you hit the ‘forward’ or ‘backward’ options next to ‘Analyze’. You can also do it frame-by-frame for more accuracy.
Depending on the complexity of your moving object, you may need to make adjustments as you go along.
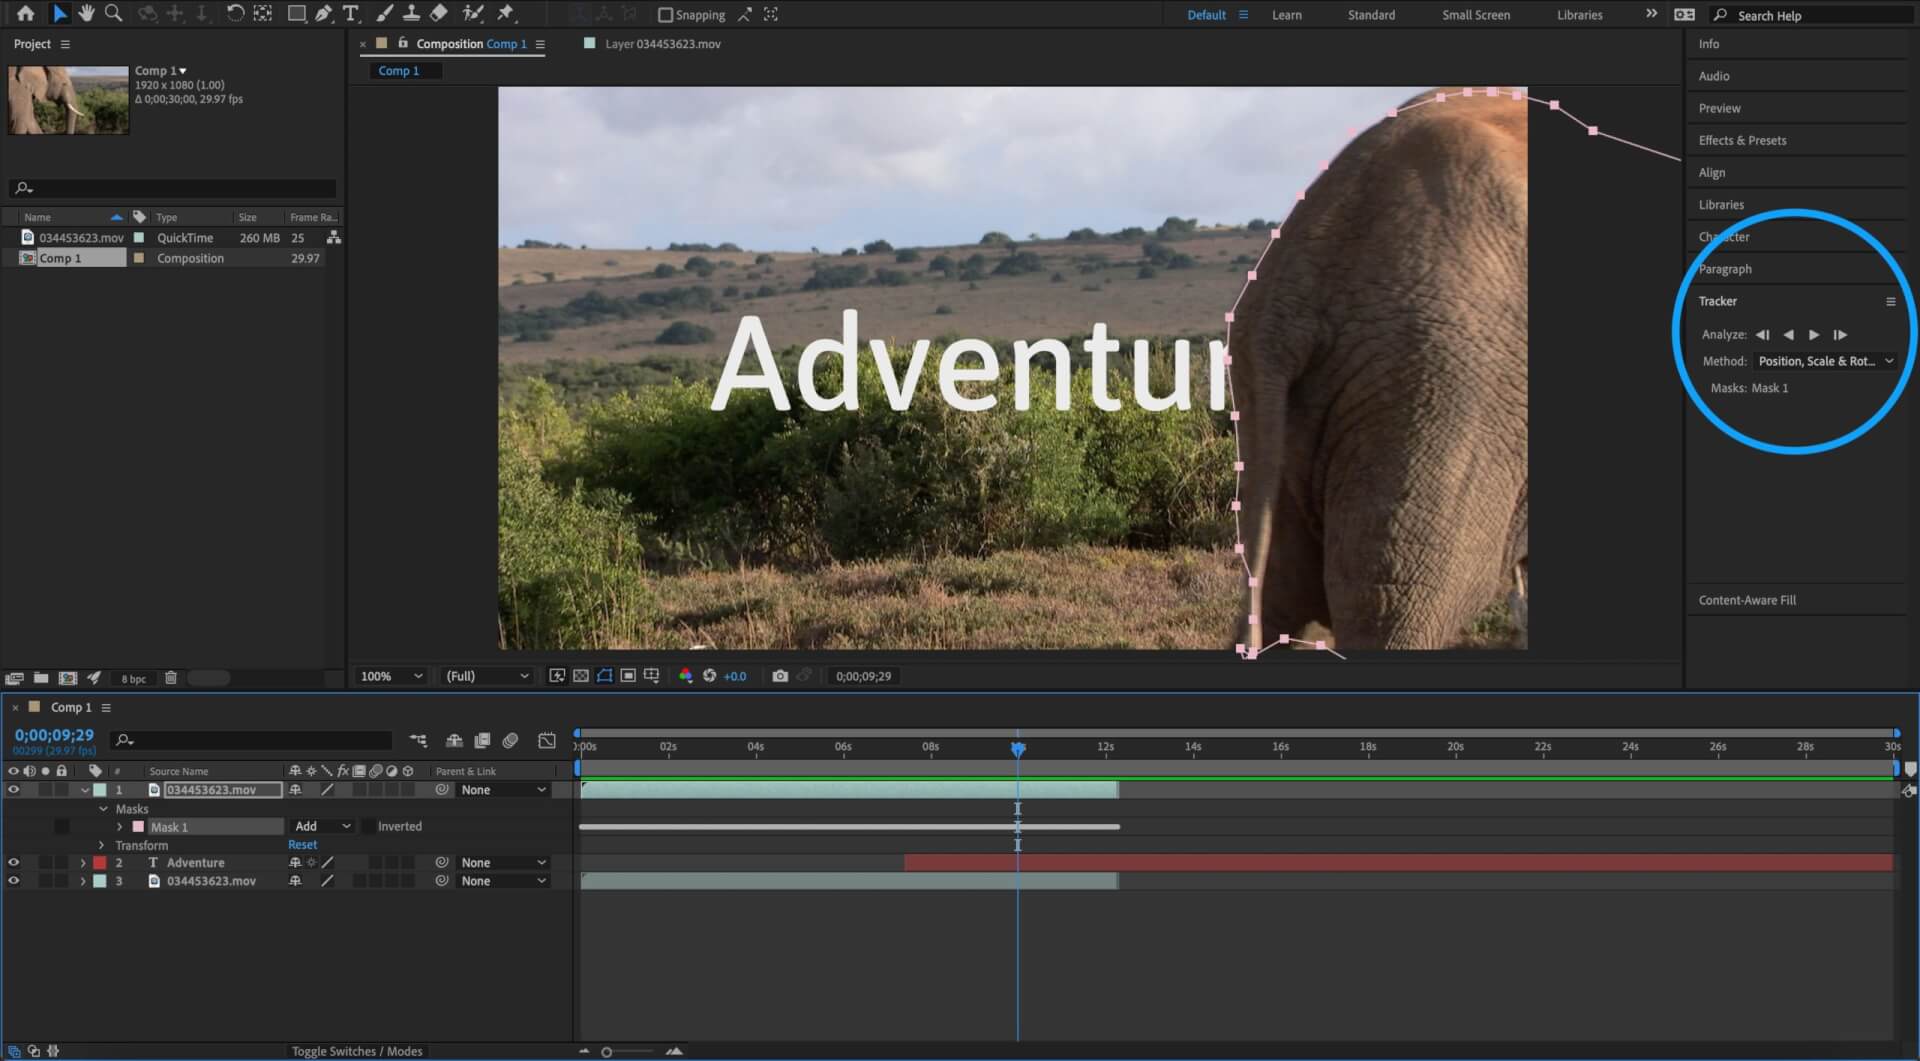
Adobe After Effects can automatically track the movement of your mask but it won't always get it right so be prepared to make adjustments.
Step 5: Export to Premiere Pro and then export the edited video
Once you’ve done all that, you can go ahead and export your composition to Premiere Pro and then export the full video.
You can do this in Premiere Pro by going to File > Adobe Dynamic Link > Import After Effects Composition.
As you can see, layering your text behind a moving subject like this is surprisingly quick and easy; it’s a great way of adding natural depth to your videos. And from here, you can go on to other edits such as motion tracking.
Now that you know how to mask and track objects in After Effects, your mind will be buzzing with fresh video editing ideas.
If there’s a video editing technique you’d like to learn, head over to our social channels to let us know.